Jupyter Notebook
This template provides a ready-to-use, GPU-capable Jupyter Notebook environment pre-installed on your Trooper.AI server. It is designed for seamless usage, including data science workflows, AI model development, prototyping, and CUDA-enabled computation.
Jupyter Notebook Template Overview
Once deployed, Jupyter Notebook runs as a system service under the non-root user trooperai. The service is always available after a reboot and requires no manual reactivation. You can begin working immediately via the browser-based interface.
Key Features
- Pre-installed Python environment using virtualenv
- Integrated GPU support with optional CUDA/cuDNN installation
- Persistent workspace directory located at
/home/trooperai - Service-based launch: Jupyter runs as a system service and auto-starts
- Token or token-free access for simplified security
- Easy to use file upload into your GPU Server Blib
- SSH Terminal in your web browser with multiple concurrent sessions
Accessing Jupyter Notebook
After deployment, your GPU Server Blib assigns an available public port automatically. To access Jupyter Notebook, open your browser and navigate to:
http://your-hostname.trooper.ai:assigned-port
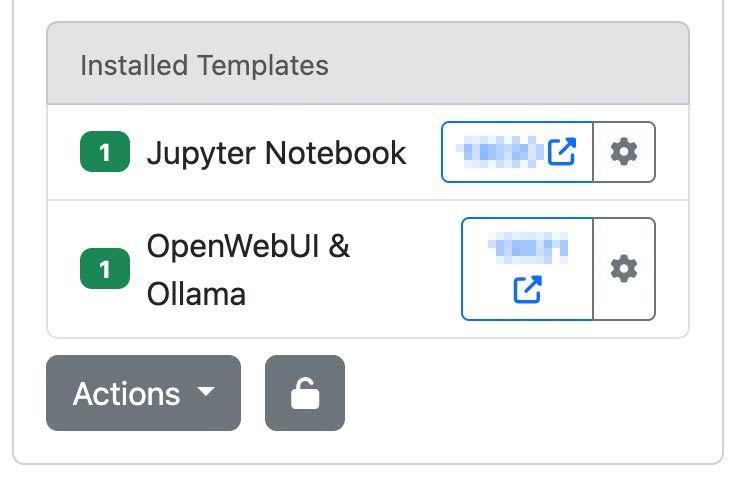
You’ll find the assigned port number next to the template in your server details at james.trooper.ai . See here:
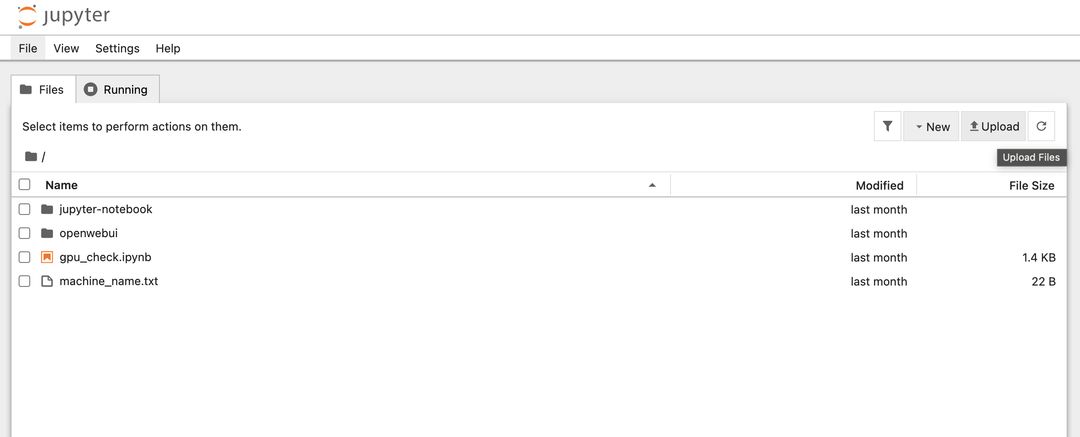
After clicking the port a new browser window will open the file list of the home or workspace folder:
If token authentication is enabled, the interface will request a token on first access. Otherwise, the notebook will be available directly. Mostly tis token is automatically appended to the URL so you don’t have to worry about authentification. You can change or reset the token in the Template Configuration.
Jupyter opens the following directory as its root workspace:
/home/trooperai
You can change this in the Template Configuration, see here:

We recommend the users home folder (default) or /workspace.
Also you can activate the automatically run of onstart.sh in your workfolder on startup of the server to start your app.
GPU Verification and CUDA Support
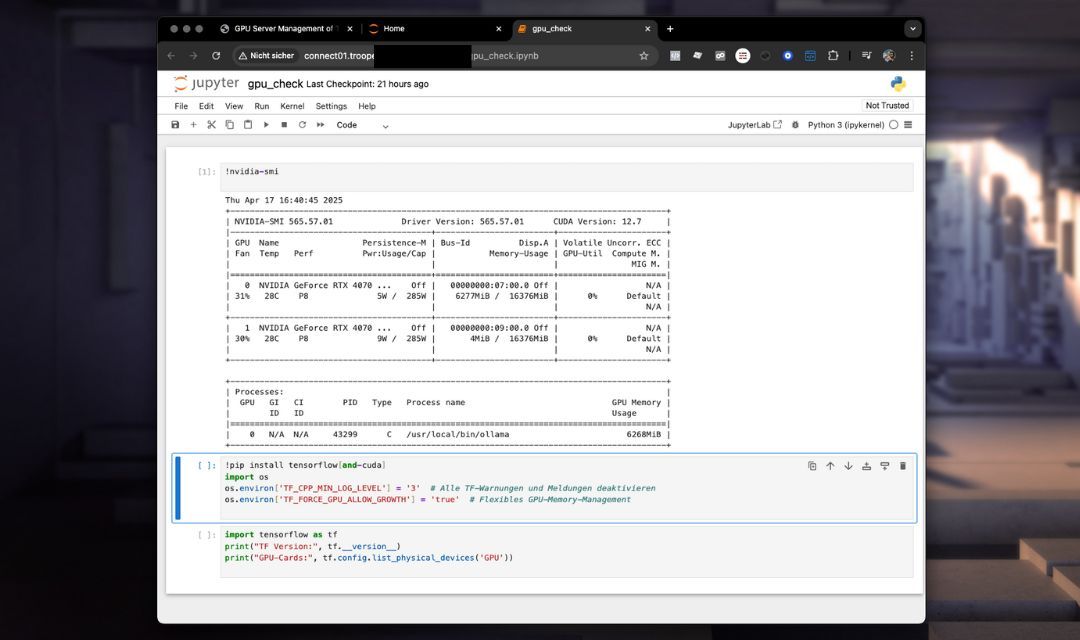
The template includes a notebook named gpu_check.ipynb to verify GPU availability and TensorFlow setup. Also it installs all needed tools for CUDA usage in Python.
Sample content of gpu_check.ipynb:
!nvidia-smi
!pip install tensorflow[and-cuda]

import os
os.environ['TF_CPP_MIN_LOG_LEVEL'] = '3'
os.environ['TF_FORCE_GPU_ALLOW_GROWTH'] = 'true'

import tensorflow as tf
print("TF Version:", tf.__version__)
print("GPU-Cards:", tf.config.list_physical_devices('GPU'))
You can extend this to use other frameworks such as PyTorch or JAX.
Terminal in Browser
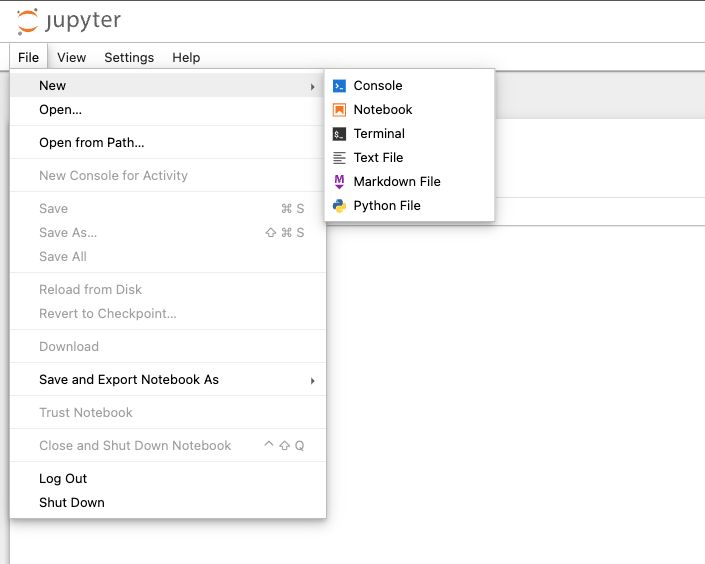
You can simple hook up a terminal session in Jupyter Notebook which is persistent until reboot! How great is this? Even if you close the browser, its still there running in that terminal what ever you like. Very useful. Go to FILE > NEW Terminal like here:
You will see a terminal window with interactive shell like this:
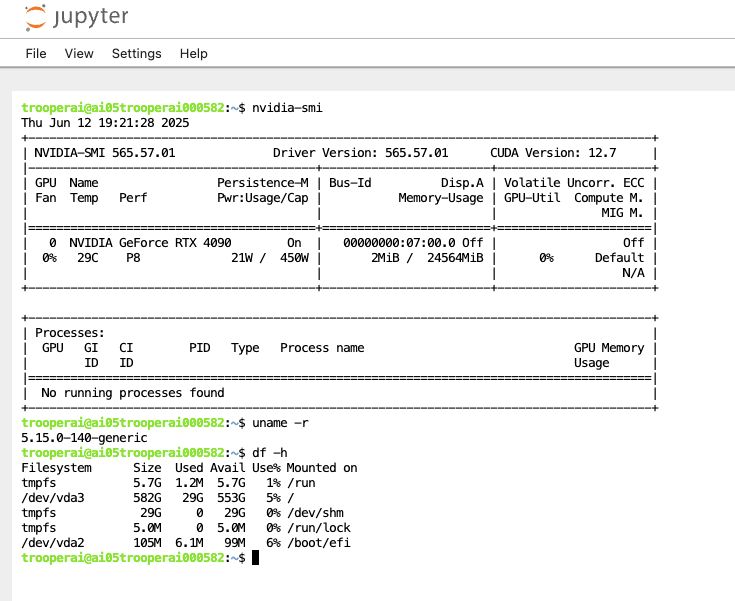
We use this often to quickly check something on the GPU server.
Recommended Use Cases
- Data exploration and visualization
- Deep learning and machine learning prototyping
- GPU-powered training workflows
- Teaching and workshops
- Upload and download files to the GPU server
Import and install help
If you need to install additional libraries into your Jupyter Notebook, just just the !pip install command like this:
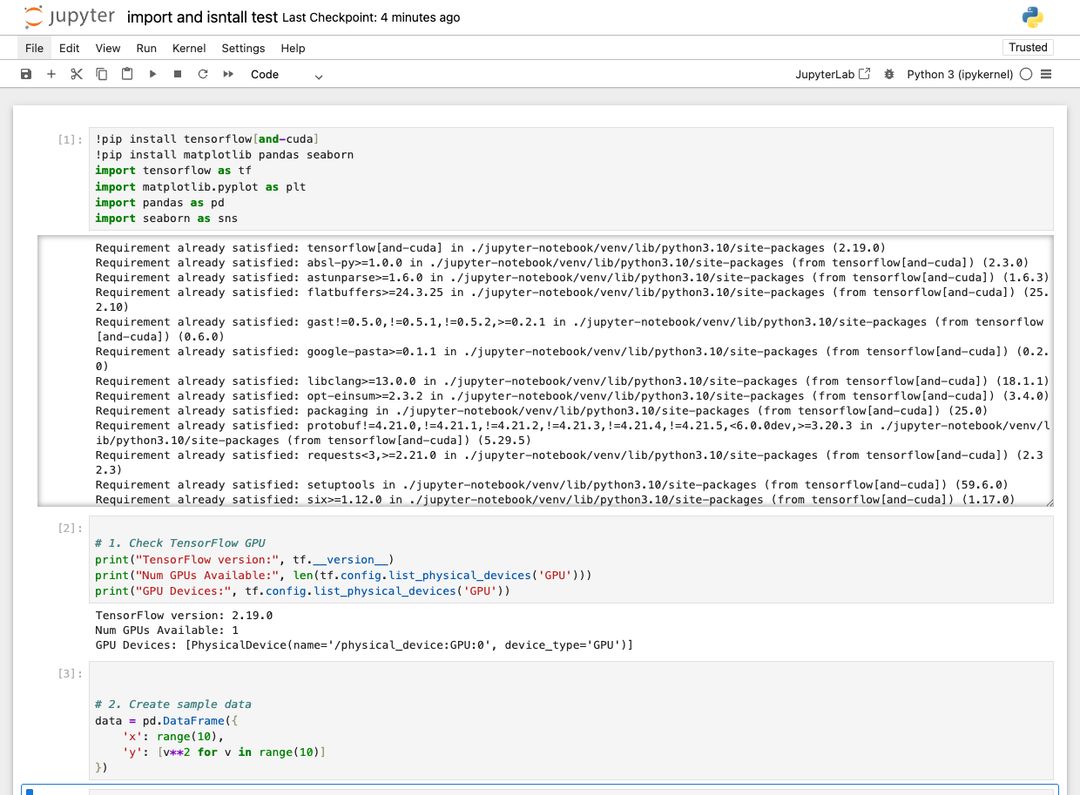
This will always check if everything is installed and if not it will do so.
Important: Always make sure you install Tensorflow with CUDA like: !pip install tensorflow[and-cuda]. Otherwise it will not work with the GPU.
I got Warnings?
There are always some warnings colored in red in Jupyter Notebook. These are mostly not an issue. See here:
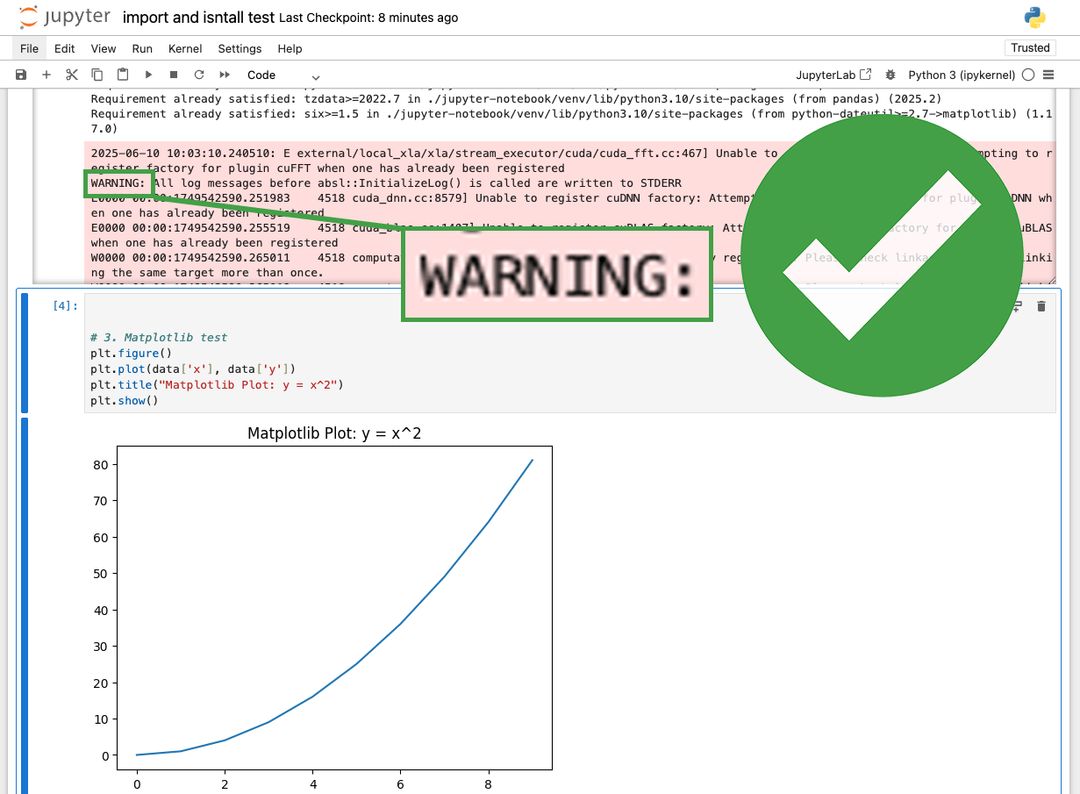
You should look into it and check if a warning is about GPU usage and verify it is not reducing performance. You can also turn off warnings, but this is depended to the library and sometime difficult. We recommend just to stick with them.
System Details
Default Configuration
- Jupyter Notebook interface on an automatically assigned port
- Python virtual environment in
~/jupyter-notebook/venv - Workspace directory:
/home/trooperai - Automatically starts after reboot
Optional GPU Stack
If your instance has CUDA installed, Jupyter will automatically detect GPU support. CUDA 12.8 and cuDNN 9.8 are available with TensorFlow compatibility.
Customization & On-Start Script
A file named onstart.sh is included in your workspace. It can be modified to run custom shell commands on every system reboot. To activate it, contact support to enable onstart execution.
Q&A
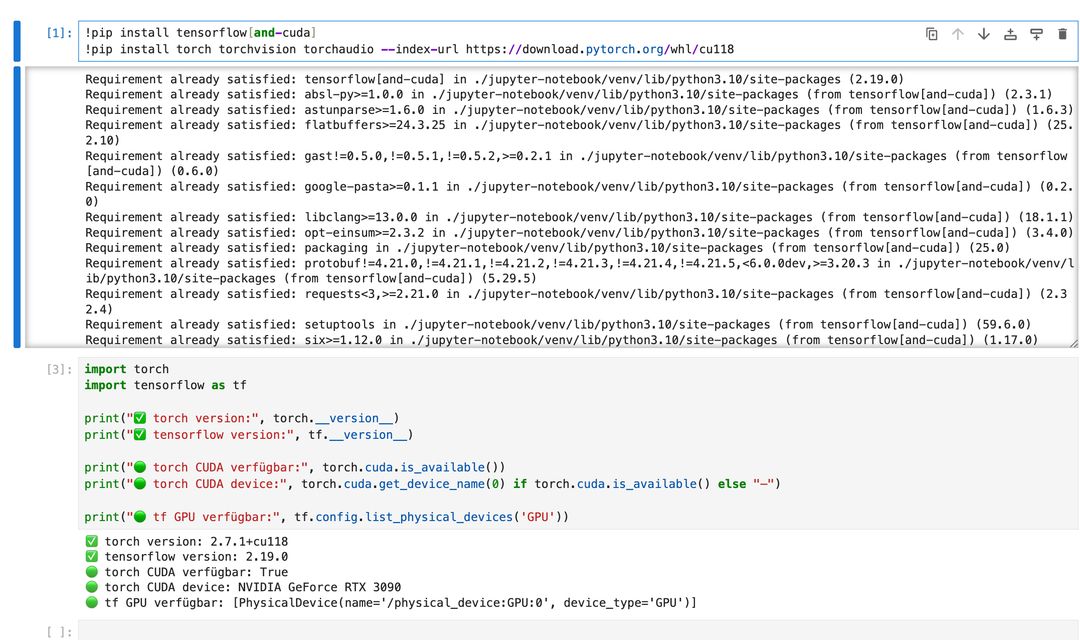
❓ How can I install both PyTorch and TensorFlow with GPU support using pip?
✅ Answer:
You should install TensorFlow and PyTorch separately to avoid CUDA dependency conflicts. Here’s the recommended way using pip:
# Install TensorFlow with GPU support
!pip install tensorflow[and-cuda]

# Then install PyTorch with CUDA 11.8 (example)
!pip install torch torchvision torchaudio --index-url https://download.pytorch.org/whl/cu118
Do not combine both into a single pip command like this:
# ❌ Not recommended — may cause conflicts!
!pip install torch tensorflow[and-cuda]
Instead, install them separately, in the correct order.
After installation, test GPU availability inside your notebook:
import torch, tensorflow as tf

print("Torch CUDA:", torch.cuda.is_available())
print("TF GPUs:", tf.config.list_physical_devices('GPU'))
❓ How do I install packages via pip via terminal to use in the Jupyter Notebook?
✅ Answer:
Your Jupyter Notebook was set up using a dedicated Python virtual environment! So you need to run pip from that environment in the terminal. For example:
/home/trooperai/jupyter-notebook/venv/bin/pip install tensorflow[and-cuda]
To activate the environment and install interactively:
source /home/trooperai/jupyter-notebook/venv/bin/activate
pip install torch torchvision torchaudio --index-url https://download.pytorch.org/whl/cu118
After installation, restart your notebook kernel to make the new packages available.
Support
For installation support, token recovery, or workspace troubleshooting, contact:
- Email: support@trooper.ai
- WhatsApp: +49 6126 9289991